
Digital Art has always been my favorite form of art as it allows for an unprecedented amount of freedom and creativity without the anxiety often associated with traditional form of art. This isn’t to say that Traditional Art practices are bad or archaic, but that I find Digital Art to be very forgiving when it comes to experimentation. In the hands of a master, Digital Art can create such amazing and beautiful masterpieces. Even in the hands of an amateur (such as myself) beautiful pieces of art can be created.
Something I feel that must be stressed is that Digital Art is a method of creating art, but it won’t increase your artistic talent. Only hard work and practice can improve the skill of an artist. I spent some time during my five high school years in art class learning and practicing different styles and techniques and continue to practice to this day. One important lesson I’ve learned is that, no matter what level you feel you are at, there will always be room for improvement. But with this in mind, there’s never anything wrong with feeling proud of something you spent time and effort in creating. Work hard and be proud of what you create.
The first thing you need is a scanner. I use an HP Photosmart printer with a built in scanner but any scanning device will do. I would recommend avoiding the use of taking a picture instead of scanning as the picture quality you get won’t be as crisp or clear as it would be with a scanner. HP Photosmart is very useful because when you scan a picture, it gives you the option to play around with the settings to darken or lighten the picture and make it clearer.
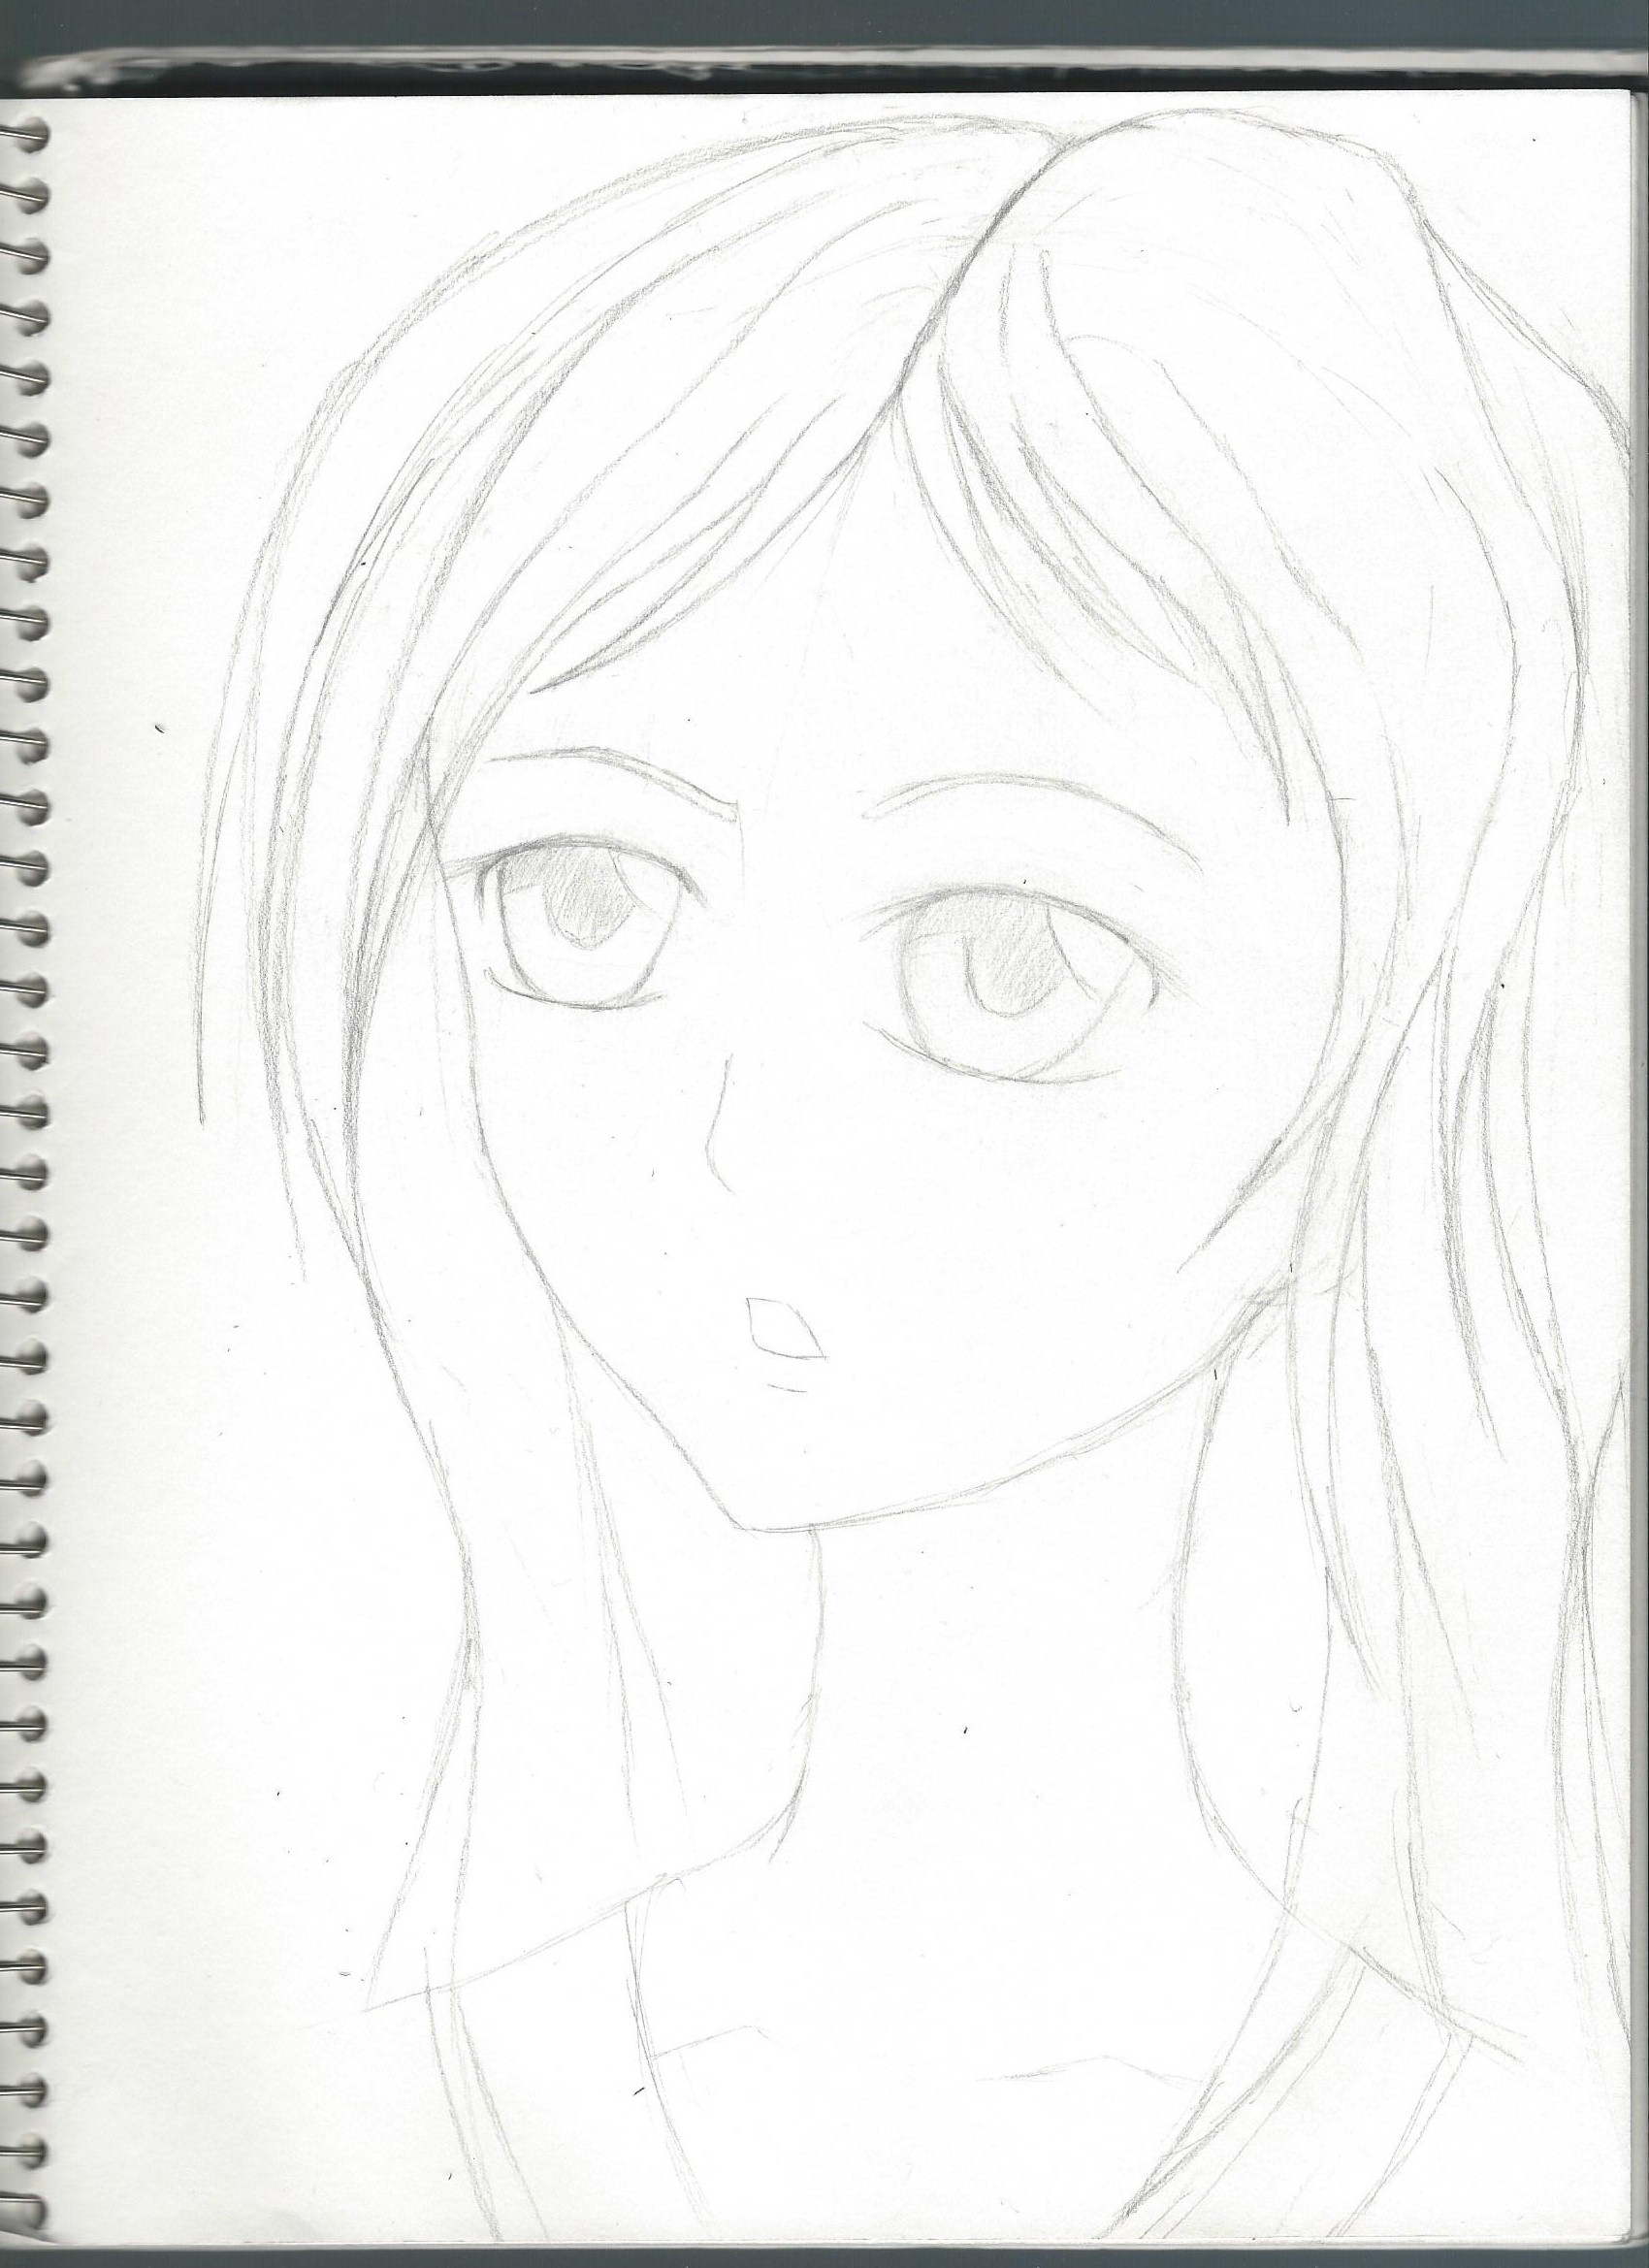
Took me roughly a couple hours just messing around with the hair, but I was happy with how it turned out. It didn’t matter too much that I sketched it lightly, you can play around with the settings to darken the lines to make it more visible. You can also choose to ink the lines before you scan it but I prefer an alternative method.
For inking the sketch (essentially darkening the lines) I prefer to use a tablet app and a stylus pen. I use a tablet because it allows you to see the effect of your outlining with the ability to undo any mistake. I also like the ease and flow of turning on the tablet app and using the stylus to darken, fix and alter anything I feel needs to be fixed. The tablet I use is an Asus Transformer pad A300 which runs ICS I believe. It’s a very fast tablet and is very reliable which helps as it won’t crash while I work. This is important as I don’t want to risk losing any important work. There are several apps out there that are great for doing art on a tablet. Sketchbook pro is very professional and allows you to do amazing things with lining and coloring, but I prefer to use Layerpaint to outline my work, i believe it may be a few dollars on the app market. Layerpaint offers one very important feature that is hard to find in most of the other apps, it allows you to maintain the resolution of your artistic project when saving it. This is ideal as it allows you to produce a higher quality image. The Image Resolution is the size of the image usually measured in pixels. The higher the resolution means the picture has more pixels. This makes it so when you zoom in, instead of seeing a pixely blur the picture can remain crisp and detailed. This is also important when zooming in during the coloring phase for important details.
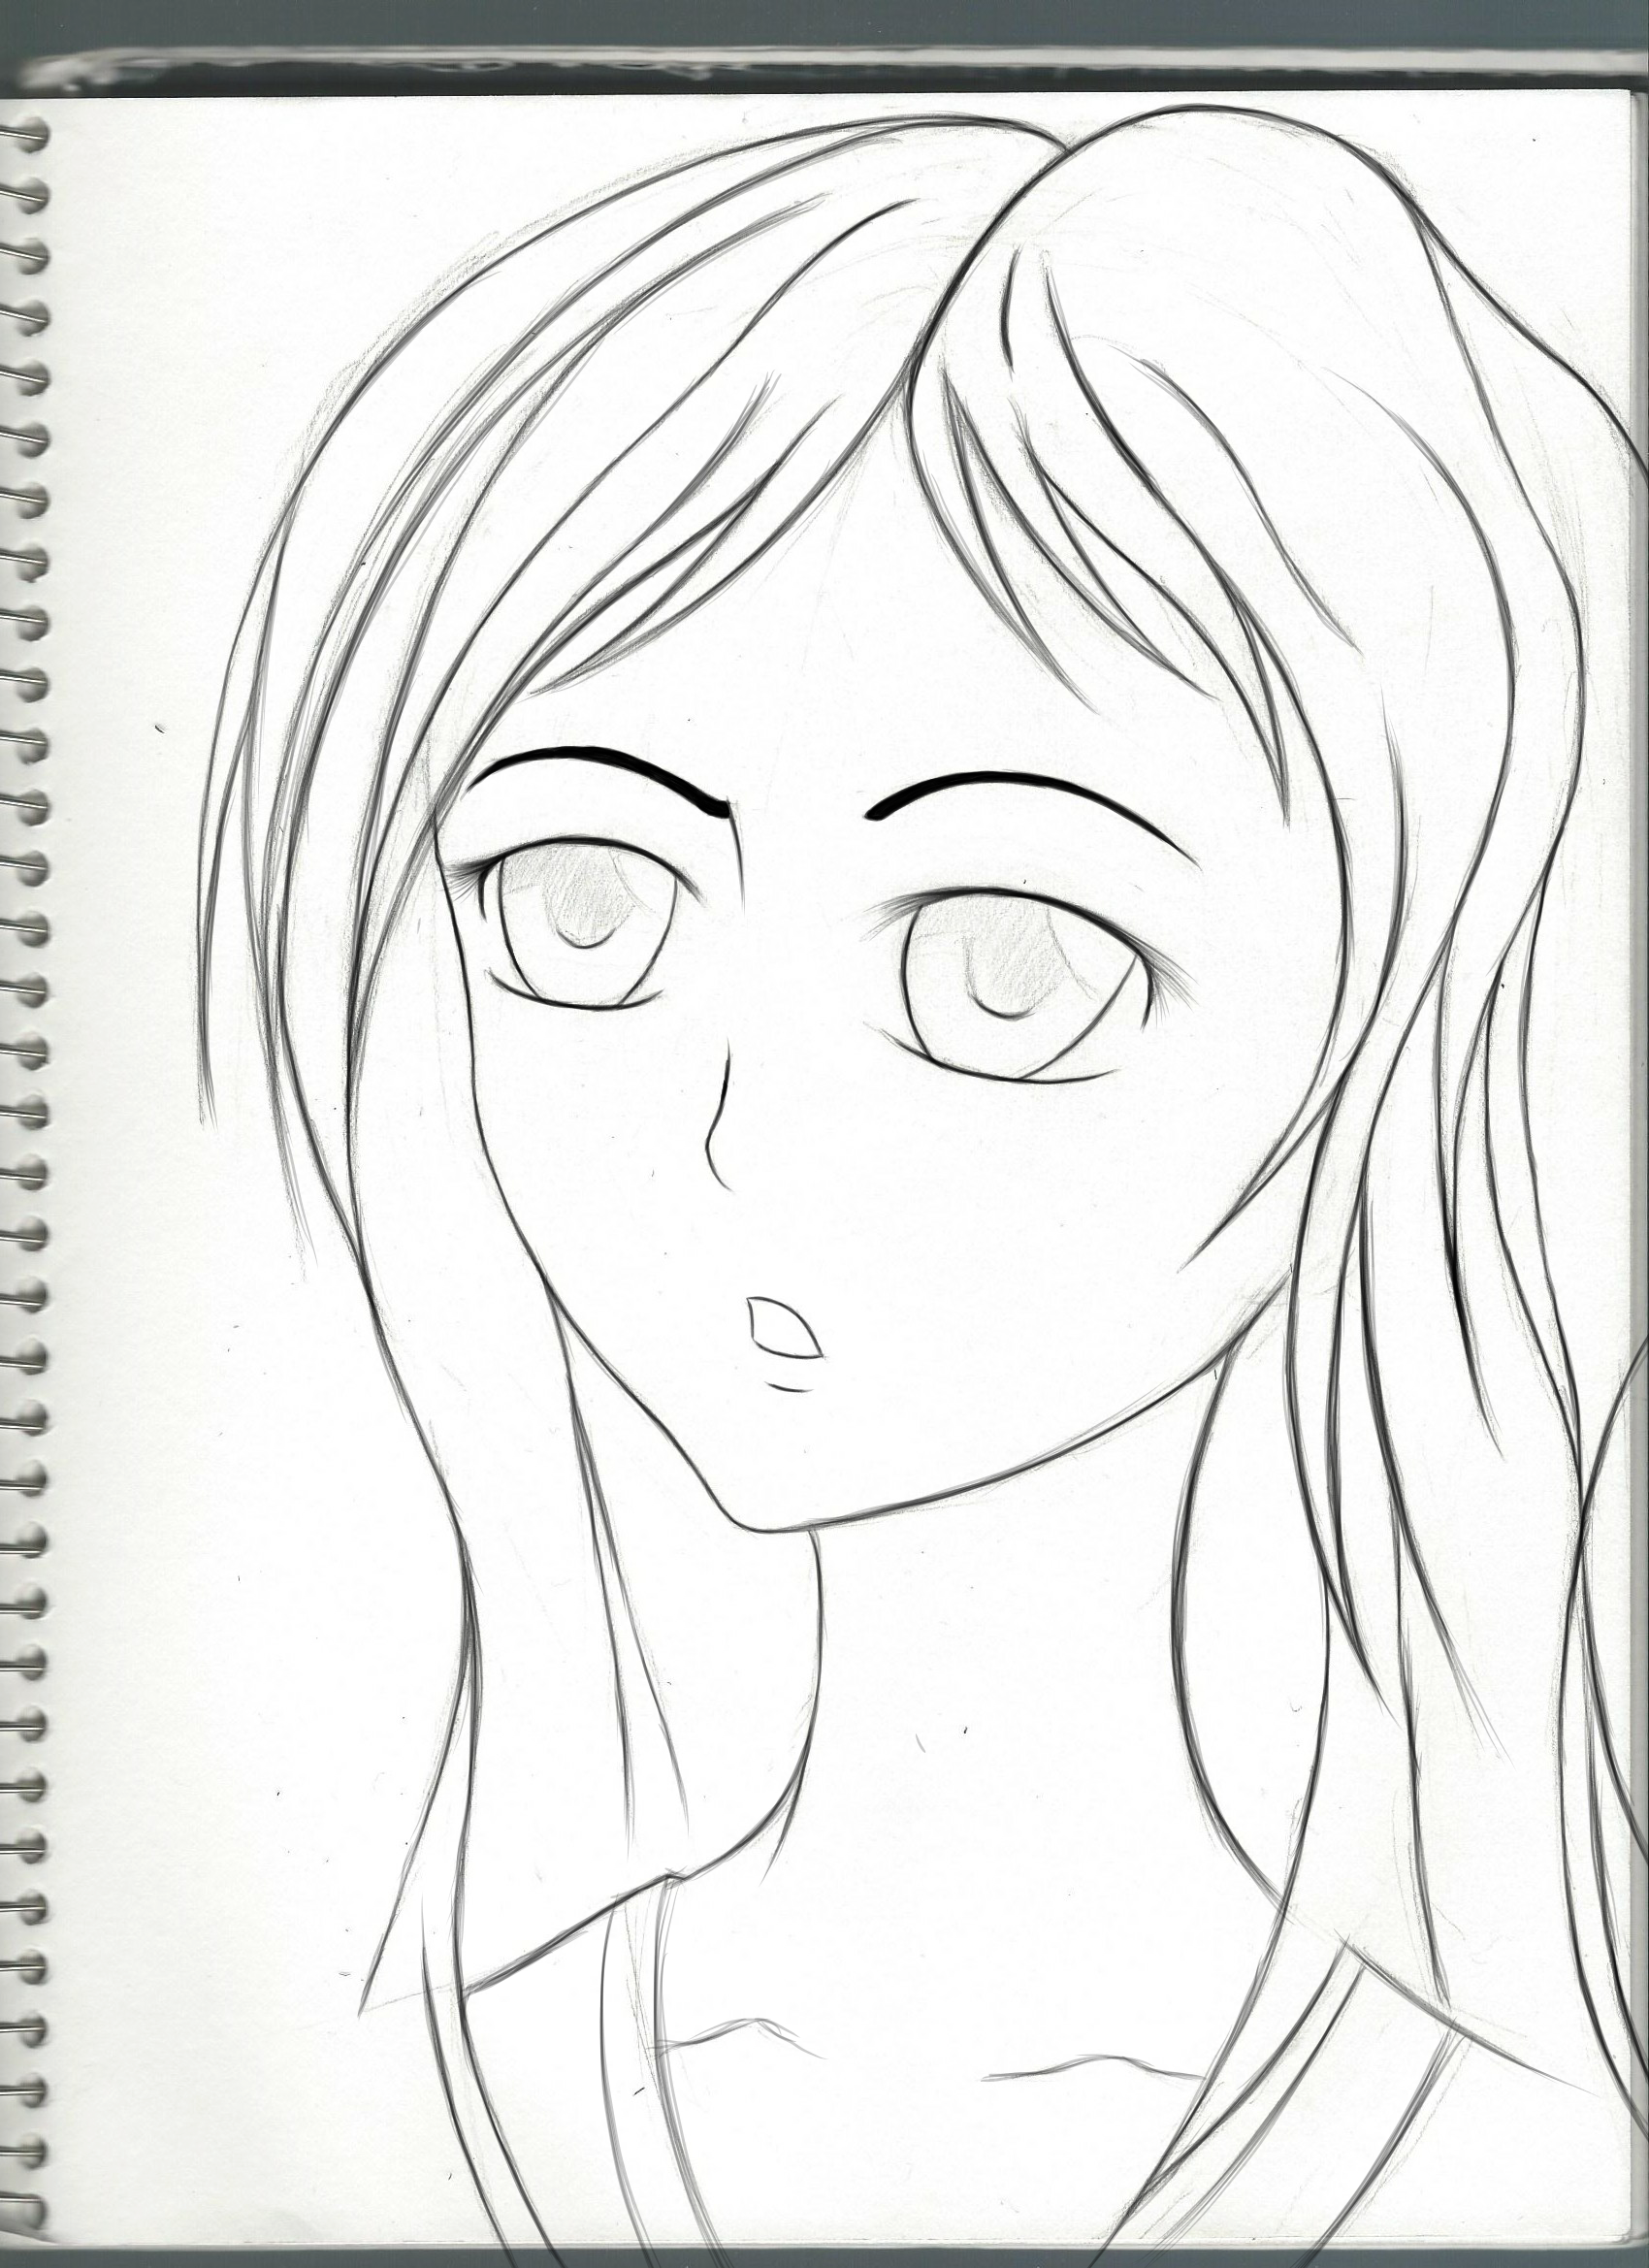
It took a while for me to outline her, but the most important part was that it was very fun to do so. This is why I prefer outlining on the tablet, it allows for no anxiety while outlining and it feels genuinely fun to work on a tablet as you can take it anywhere. There are many styluses you can use but I recommend two that are very good quality, The Dagi Stylus Pen or the Adonit JotPro Stylus. Both of these styluses have a pointed end attached to the center of a disc that imitates a finger when used on a tablet or phone. While both are great, I prefer the Adonit JotPro Stylus as it feels sturdier and can be bought at any locals Staples (The Dagi Stylus Pen has to be ordered from Japan, I’m not sure if there is another way to purchase it other than eBay).
After you are done outlining, it is time for the most exciting and often the most anxiety inducing step, coloring the project. There are several programs you can use, Photoshop for one, but I prefer to use PaintSai. It’s an easy to use program that is simple to use while being difficult to master. Unlike Photoshop, PaintSai allows you to undo several steps rather than only the previous step. When using either Photoshop or PaintSai, I would highly recommend looking up tutorials to get an idea of how to use either. There are several fantastic tutorials on Youtube, DeviantArt, and even through Google. The most important part of both is the use of Layers. Think of these Layers as combining several different parts to create something greater. The Base layer will often be the color you choose to use, the next few layers may be used to add in shading to darken certain parts while the final few layers may be used to lighten up some areas to show contrast.

The eyes took several different Layers to create, luckily Photoshop and PaintSai have folders to help organize your Layers. What I do and what several digital artists do is create Folders for one particular part of the picture and put the Layers involved inside. In this instance, I created a folder Labeled “Eyes” and inside I had my Layers each labeled for what they were i.e. “Base Color” “Shading 1” “Shading 2” etc. It helps to organize what you did and refer back to what part you may choose to fix or alter. Now there are some who would argue that you can use a mouse to create these results, but I feel that using a drawing tablet is the best way. I use a Wacom Bamboo Drawing tablet which can now be bought at your local Futureshop or other tech stores I believe. They used to be very expensive but now they’re roughly less than $100. There are several types of drawing tablets you can purchase but I recommend using the bamboo as the higher end tablet, while they allow you to draw on the tablet themselves rather than having to learn to color on the tablet while your eyes are on the monitor, they are very expensive and are for those who are either in the industry or heavily invested into Digital Art. One day I hope to get one, but until then I will stick with my Wacom Bamboo tablet. Coloring can be very difficult, but once you understand layers and refer to tutorials frequently to learn methods for coloring eyes, hair, skin etc, it’ll become easier.
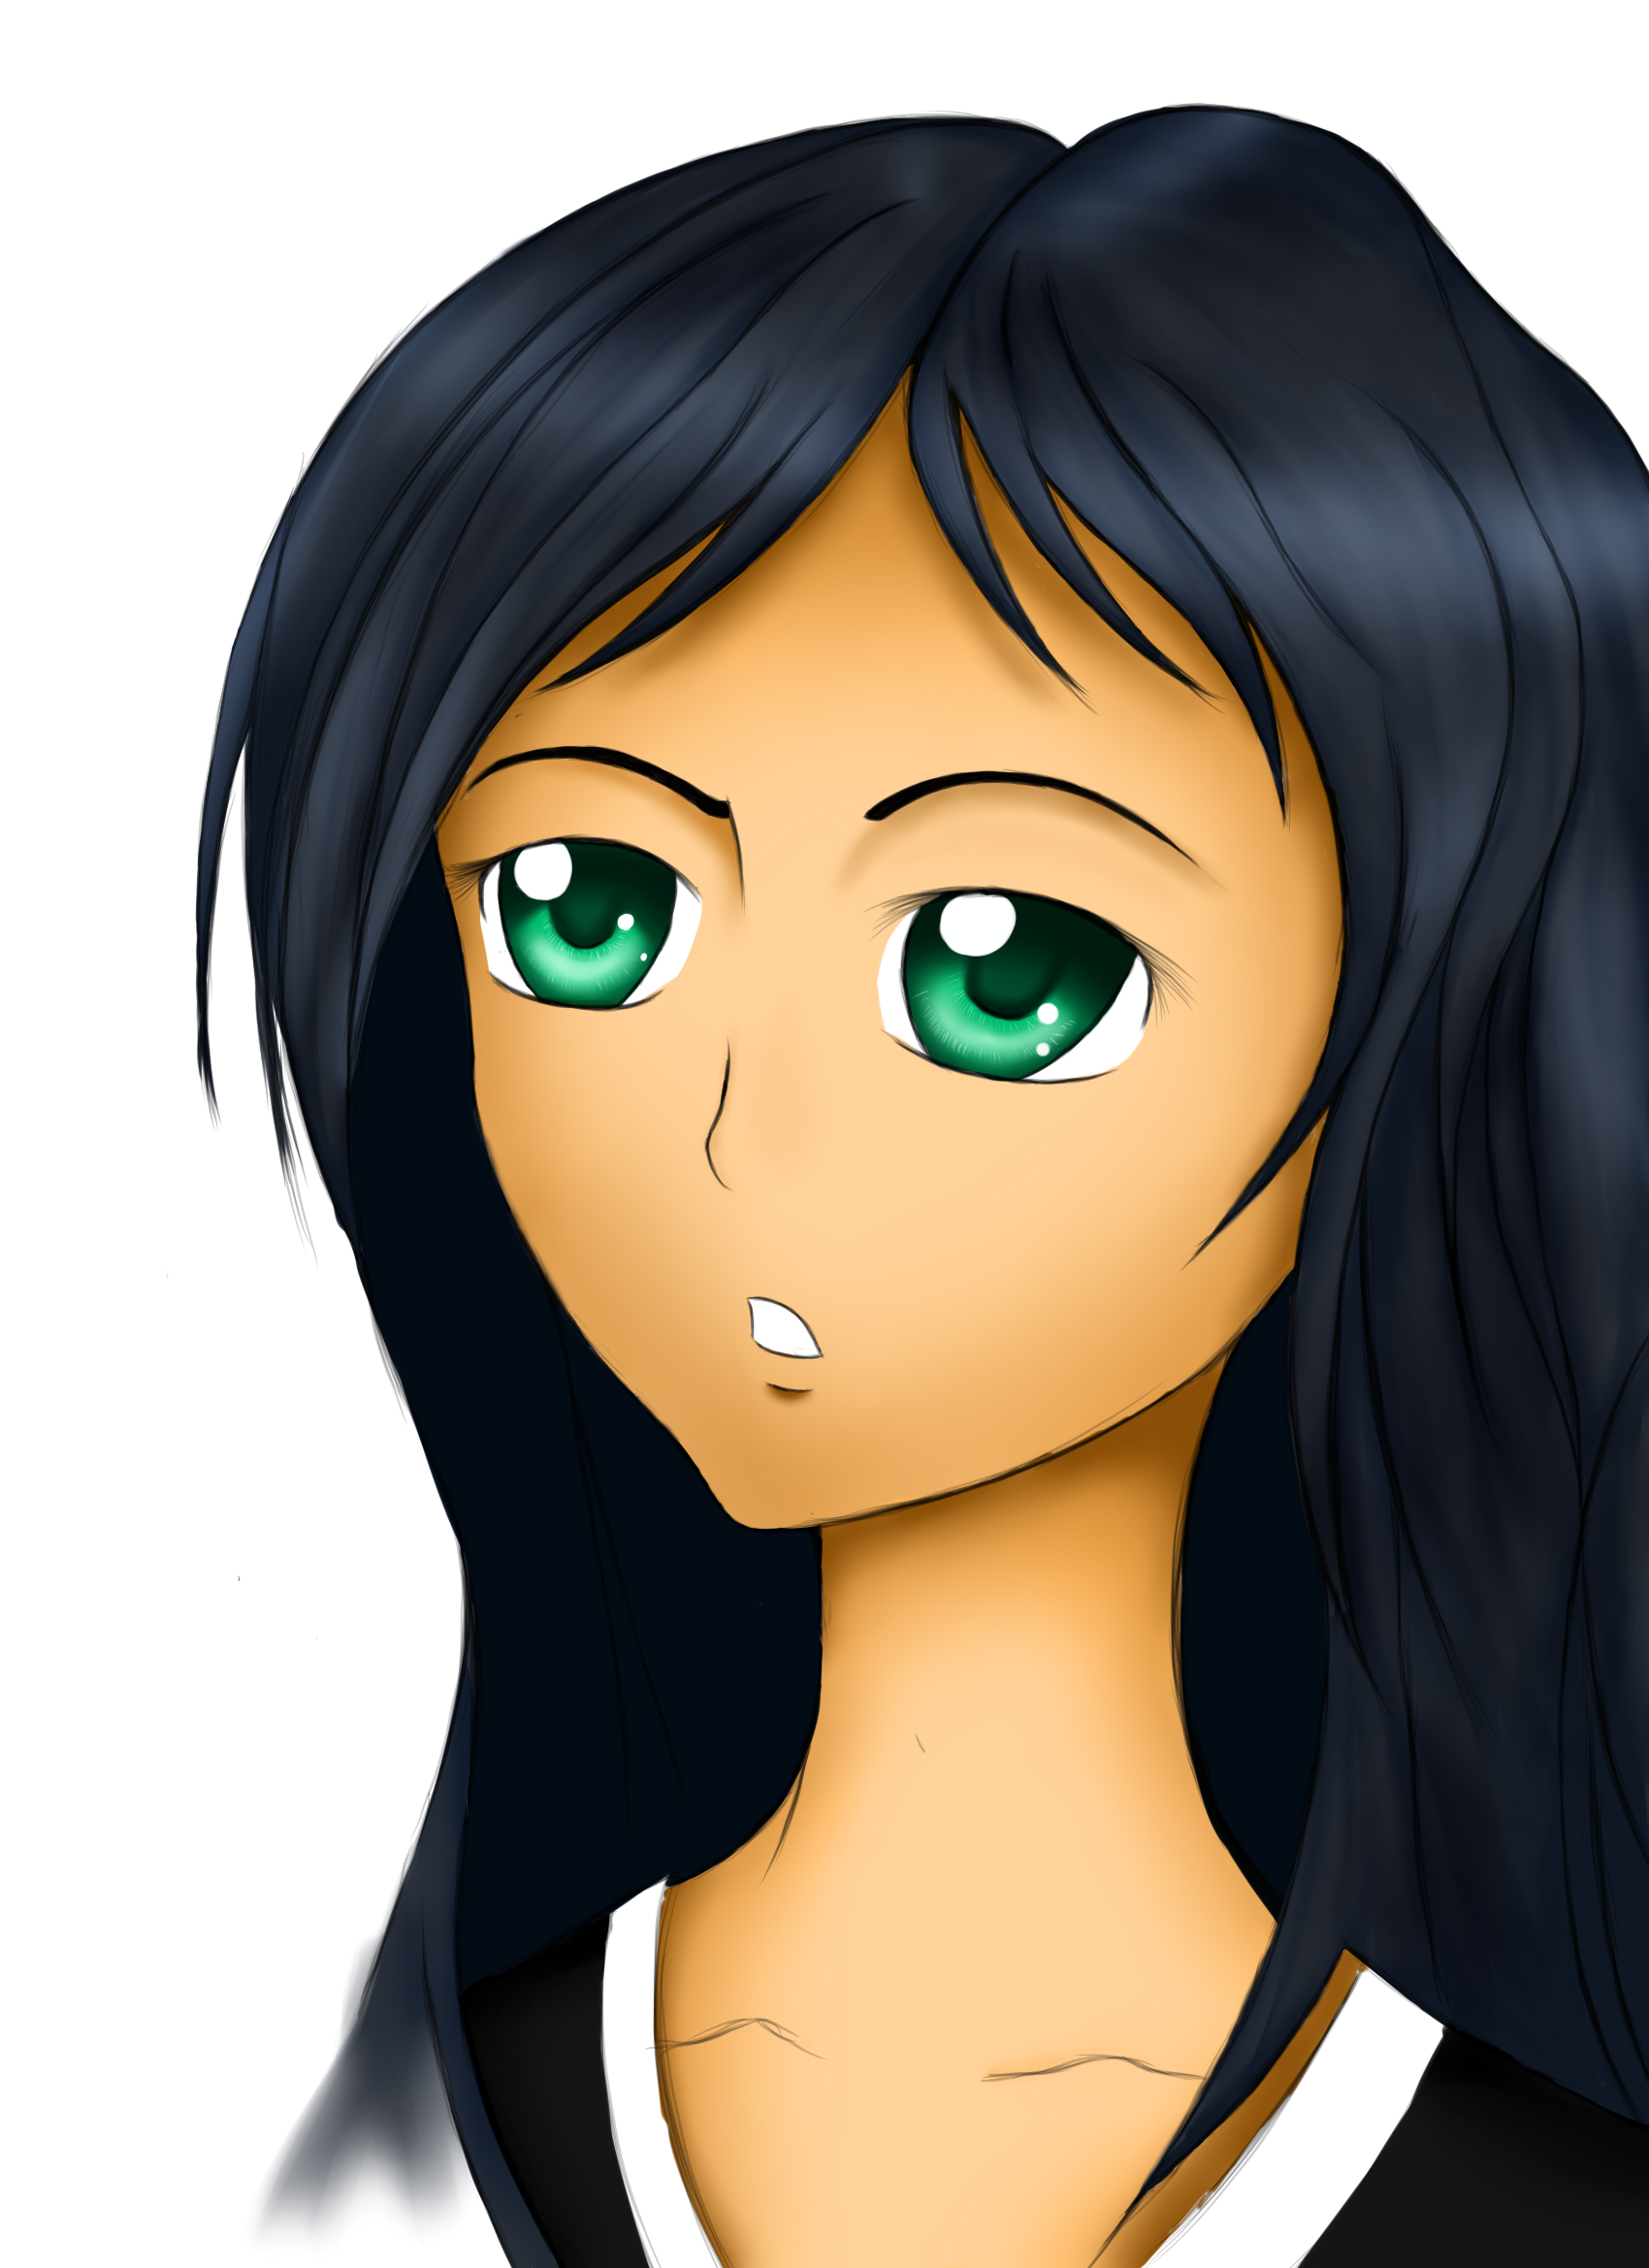
This took me several hours of practice, tutorials, and patience to create, but I can honestly say I was very happy and proud of myself when she was done. Digital Art is a very fun and amazing hobby for those willing to put the time, effort and patience involved in learning it. It took me 7 or 8 years to get where I am now and its honestly not very difficult to get to this level. I chose to stumble around and try to create my own style and learn by trial and error. But recently I learned that tutorials are so useful and make the process easier and more enjoyable.
The Best and most Important thing to remember is that anyone can be a Digital Artist, all it requires is to be Passionate and Hard Work.
Hope this Helps!
-Raphael

2 thoughts on “Digital Art: How to get Started”