
As promised last week, here’s a tutorial on how to color and shade skin for your digital art piece!
Similar to shading and coloring hair and eyes, the more detail you put into the sketch and ink work, the more you can get out of the image. As always, the tools I use are the same as the previous tutorials, a Wacom Drawing Tablet, Stylus, and the Program PaintSai.

Step 1: Base Color
As always, the first step is to color in the Face with the base skin color. Our finished product will most likely have a darker tone so it helps to have the base color brighter than intended.

Step 2: Shade Lines
In a new layer above the base, also set to Multiply, select a darker color and shade in areas that are meant to be darker. This allows for more depth and tone for the skin. Do not worry about being neat and tidy. Remember to have the Clipping Group setting checked so that the color does not leave the base layer.

Step 3: Blurring
This step is rather simple but does require finesse, making a stylus and tablet more desirable. However the same results can be achieved through the use of a mouse, though it will require more time and effort. When using the blur tool, try to blend the two separate colors together to create a more natural effect.

Step 4: Further Shading
In a new layer above the Shading Layer, also with the same settings, select a darker color and fill in darker areas. Effectively this adds a new layer of depth and further increases the gradient of skin tone.

Step 5: Depth!
Now that we have our darker color added, we simply blur the darker tone to blend with the previous tone. For this step, make sure not to use too much blur to completely blend the two colors as the darker tone stands out more. This creates a greater sense of depth in the character’s face. This also applies for the other parts of the body as well.

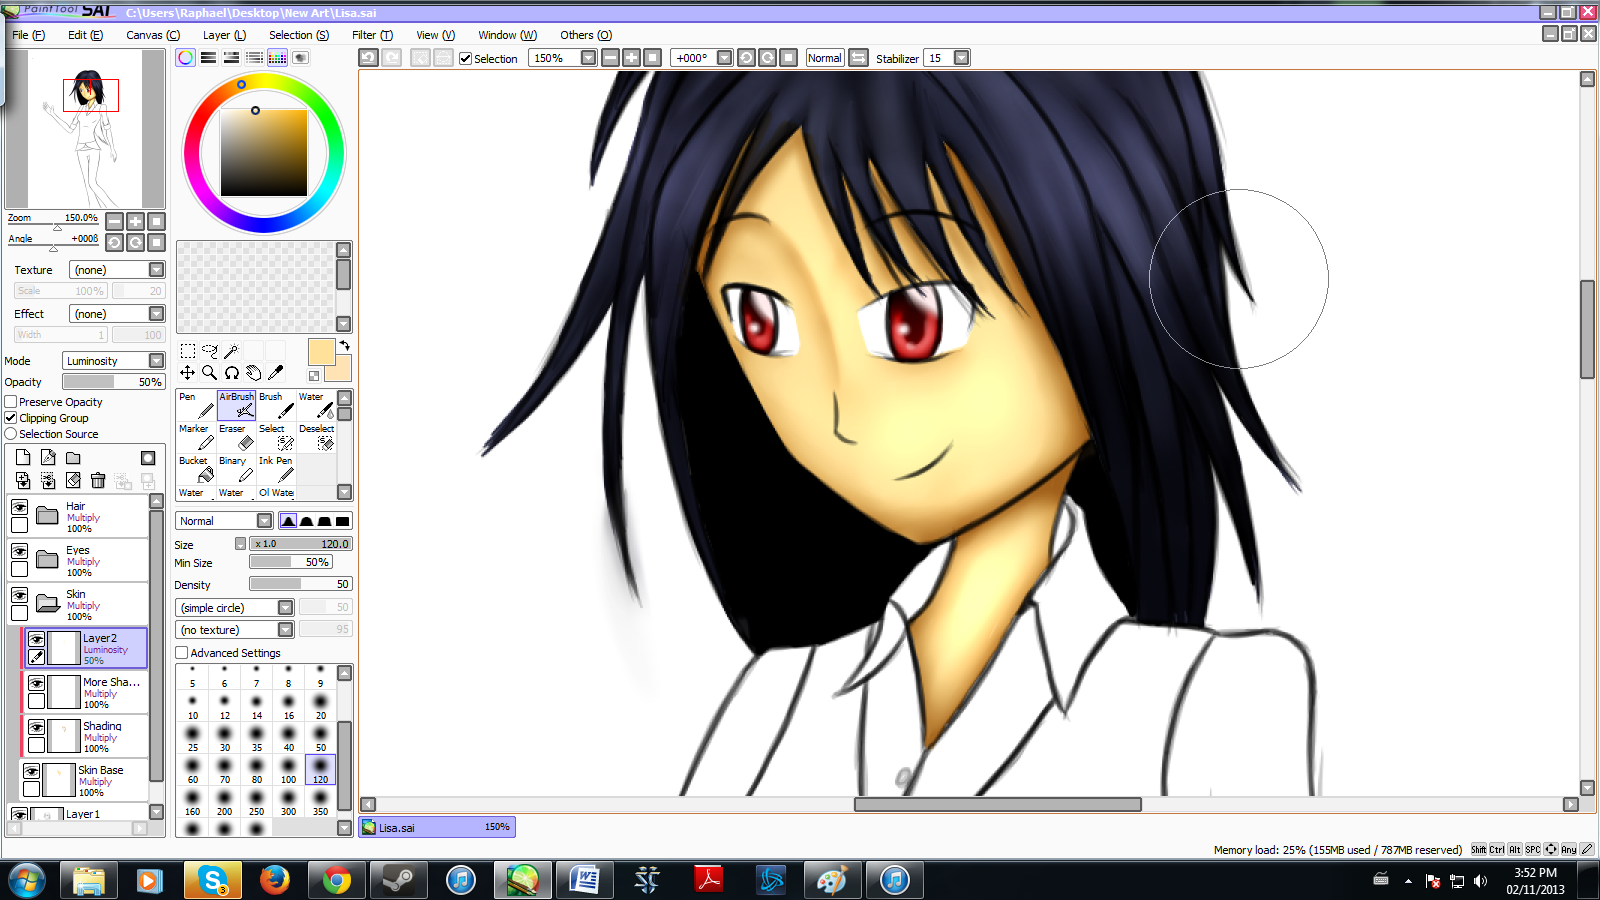
Step 6: Lighting
Now the final step is to bring out the original base color. In a new layer above both Shading Layers, set to Luminosity and having the Clipping Group option checked, use the Air Brush to lighten the areas not shaded. Be careful how much Air brushing is done as too much can create a strange, abnormal glow in the character’s skin. A light touch of Air Brush is all that is necessary.
Step 7: Modify Previous Lighting (Optional)
This step is very simple as it is just changing the Opacity Level of the Luminosity Layer to achieve the amount of light desired.
This is my straight forward tutorial on coloring and shading skin. As an artist, always feel encouraged to experiment with each step to achieve a desired affect. For instance, if you wanted to take it further, you could add in further layers for shading or experiment with the Air Brush in the final step. Fun and experimentation often go hand in hand in the realm of digital art.
I hope this has been helpful and informative!
– Raphael
